Beekeeping
Bush Bees Home
Queen Rearing
Why rear your own queens?
Cost
Time
Availability
Africanized Bees
Acclimatization
Resistance
Quality
Why Bees Rear Queens:
Emergency
Supersedure
Reproduction
Overcrowding
Both
Simple Split
Most Queens with Least Resources
Extreme examples
Where Do Queens Come From?
Methods of Transferring Larvae
Doolittle
Jenter
Hopkins
Other
Why I graft
Cell Starter Methods
Cloake Board
Queenless Hive
Swarm Box
Beekeeping Math
Calendar
Mating Nucs
Queen Marking Colors
Queen Marking
Jay Smith Quotes
Longevity
Emergency
C.C. Miller on Emergency Queens
Queen Banks
Cloake Board aka FWOF
Names of Queen Rearing Methods
A simple way to raise a few good queens
Queen Rearing
Methods "In
their own words"
Alley Method of Queen Rearing
Better Queens Method
Hopkins Method of Queen Rearing
Miller Method of Queen Rearing
Queen Rearing Simplified by Jay Smith
Scientific queen-rearing by Gilbert M. Doolittle
Video of setting up a cell starter
Video of setting up mating nucs
Click on Thumbnails for bigger pictures
Books for sale
Speaking
Be a patron on Locals
My YouTube Channel
Donations
Beekeeping Apprentice needed
Beekeeping Equipment
Beekeeping Carts
Beekeeping Things I Did Not Invent
Foundationless Beekeeping
Hardware Cloth Uses in Beekeeping
Hive Box Jig
Horizontal Hive Beekeeping
Lighter Beekeeping Equipment
Miscellaneous Beekeeping Equipment
Narrow Frame Beekeeping
Nucleus Hives
Observation Hives
Top Bar Hive Beekeeping
Top Entrance
Two Queen Hive
Wax Dipping Hives
Beekeeping Information
Beekeeping Acronym Glossary
Beekeeping Basics
Beekeeping Fallacies
Beekeeping Math
Beekeeping Locality
Beekeeping Systems
Beekeeping Terminology
Beginner Beekeepers
Classic Beekeeping Books
Colony Decisions
Contrary Opinions
Differences in Observations on Beekeeping
Experiment in Swarm Control
Feeding Bees
Frequently Asked Beekeeping Questions
Forums, how to get a good response
Harvesting Honey
Health Certificates since 2004
Inspections
Installing Packages
Laying Workers
Lazy Beekeeping
Mites that live on bees
More Than Just Bees
Moving Bees
Organic Beekeeping Meetings
Panacea
Presentations
Realistic Expectations in Beekeeping
Robbing
Smoke
Space Management
Splits
Spring Beekeeping Management
Swarm Control
Ten Commandments of Beekeeping
Timing
Too Many Beekeeping Options?
Unlimited Broodnest
Unnatural Things in Beekeeping
Videos of some of my presentations
Water
Wintering Bees
Bee Pests
CCD
Enemies of Beekeeping
Four Simple Steps to Healthier Bees
Mite Bombs
Natural Cell Size
Nosema
Rationalizations on small cell success
Varroa Treatments
Wax Moths
Why I Use No Treatments of Any Kind
Queens
A Few Good Queens
Feral Bees
Genetic Diversity
Quality of Emergency Queens
Queen Flying Off
Queen Rearing
Queen Spotting
Queens For Sale
Races of Bees
Requeening a hot hive
Whole bee concept
Philosophy
Beekeeping Philosophy
Belief in Beekeeping
The Hardest Thing To Do In Beekeeping
How bees change your life
Learning
Native American Honey Bees
Scientific Studies
Other Links
Beesource Beekeeping Forum
Beesource Beekeeping Home
Beemaster Beekeeping Home Page
Dee Lusby on Small Cell Beekeeping
Bee Unto Others
Dave Cushman
Resistant Bees
Beekeeper Linda
Beekeeping like a girl
Bella Donna, Apitherapist
english, español, deutsche, português, русском, româna polsku, русском,
Queen Rearing
![]()


Why rear your own queens?
Cost. A typical queen costs the beekeeper about $20 counting shipping and may cost considerably more.
Time. In an emergency you order a queen and it takes several days to make arrangements and get the queen. Often you need a queen yesterday. If you have some in mating nucs, on hand, then you already have a queen.
Availability. Often when you need a queen there are none available from suppliers. Again, if you have one on hand availability is not a problem.
AHB. Southern raised queens are more and more from Africanized Honey Bee areas. In order to keep AHB out of the North we should stop importing queens from those areas.
Acclimatized bees. It's unreasonable to expect bees bred in the deep South to winter well in the far North. Local feral stock is acclimatized to our local climate. Even breeding from commercial stock, you can breed from the ones that winter well here.
Mite and disease resistance. Tracheal mite resistance is an easy trait to breed for. Just don't treat and you'll get resistant bees. Hygienic behavior, which is helpful to avoid AFB (American Foulbrood) and other brood diseases as well as Varroa mite problems, is also easy to breed for by testing for hygienic behavior in our breeder queens. And yet hardly any queen breeders are breeding for these traits. The genetics of our queens if far too important to be left to people who don't have a stake in their success. People selling queens and bees actually make more money selling replacement queens and bees when the bees fail. Now I'm not saying they are purposely trying to raise queens that fail, but I am saying they have no financial incentive to produce queens that don't. Basically to cash in on the benefits of not treating, you need to be rearing your own queens.
Quality. Nothing is more important to success in beekeeping than the queen. The quality of your queens can often surpass that of a queen breeder. You have the time to spend to do things that a commercial breeder cannot afford to do. For instance, research has shown that a queen that is allowed to lay up until it's 21 days old will be a better queen with better developed ovarioles than one that is banked sooner. A longer wait will help even more, but that first 21 days is much more critical. A commercial queen producer typically looks for eggs at two weeks and if there are any it is banked and eventually shipped. You can let yours develop better by spending more time.
"Remember that infinitely better work can be accomplished in the way of improving one's bees by the judicious selection of breeding stock in one's own apiary, than can be done by continually bringing in unknown breeding stock from outside."--Isaac Hopkins, Australasian Bee Manual
Concepts of Queen Rearing
Bees rear queens because of one of four conditions:
Emergency. There is suddenly no queen so a new queen is made from some existing worker larvae.
Supersedure. The bees think the queen is failing so they rear a new one.
Reproductive swarming. The bees decide there are enough bees, and enough stores and enough of the season left to cast a swarm that has a good chance of building up enough to survive the winter without endangering the survival of the colony.
Overcrowding swarm. The bees decide that there are too many bees and not enough room or not enough stores to continue under the current conditions, so they cast an overcrowding swarm as population control. This swarm doesn't have the best chance of survival but the colony believes it improves the colony's chances of survival.
We get the most cells and the best feeding for the queens if we simulate both Emergency and Overcrowding.
A beekeeper can easily get a queen simply by making a queenless split with the appropriate aged larvae. So why would we want to do queen rearing?
The underlying concept of queen rearing is to get the most number of queens from the least resources from the genetics chosen for the traits you want.
To illustrate the resource issue let's examine the extremes. If we make a strong hive queenless. They could have, during that 24 days of having no laying queen, reared a full turnover of brood. The queen could have been laying several thousand eggs a day and a strong hive could easily rear those several thousand brood. Then we have lost the potential for about 30,000 or more workers by making this hive queenless and resulted in only one queen. And, actually, this hive made many queen cells, but they were all destroyed by the first queen out.
If we made a small nuc we would only have a couple of thousand queenless bees rearing several queen cells and those couple of thousand bees could only have reared a few hundred workers in that time. But again they made several queen cells and the results were only one queen.
In most queen rearing scenarios we are making the least number of bees queenless for the least amount of time and resulting in the most number of laying queens when we are done.
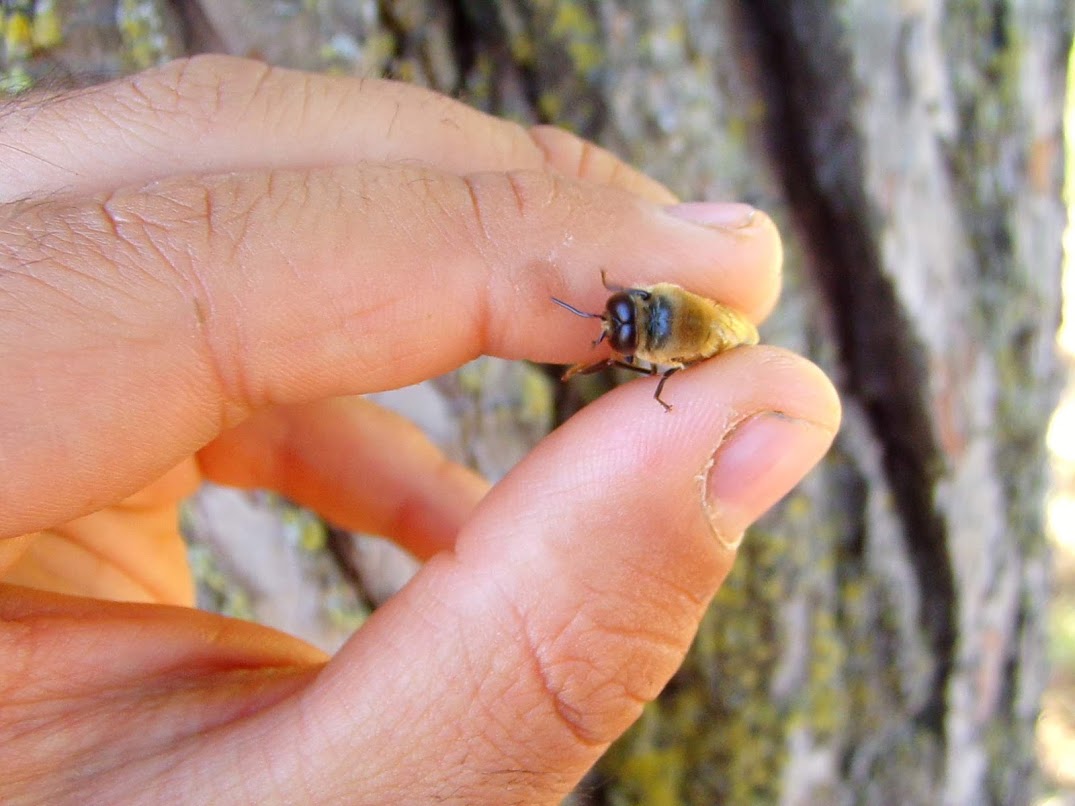
Where queens come from. A queen is made from a fertilized egg, exactly the same as a worker. It's the feeding that is different and that is only different from the fourth day on. So if you take a newly hatched worker egg, and put it in a queen cell (or in something that fools the bees into thinking it's a queen cell) in a hive that needs a queen (swarming or queenless) they will make those into queens.
Methods of getting larvae into "queen cups".
The Doolittle Method (G.M. Doolittle) is to graft the appropriate aged larvae into some homemade wax cups. This requires a bit of dexterity and good eyesight, but is the most popular method used. Today plastic cups are often used in place of wax. The queen is sometimes confined to get the right aged larvae all in one place for easy selection. #5 hardware cloth works well for this as the workers can pass through it but the queen cannot. This is usually put on old dark brood comb to make the larvae easier to see and to make the cell bottom more sturdy for grafting. Once you have a good eye for the right age larvae this is less critical and one can do this by simply finding the right age larvae. On day 14 these are usually put in mating nucs.
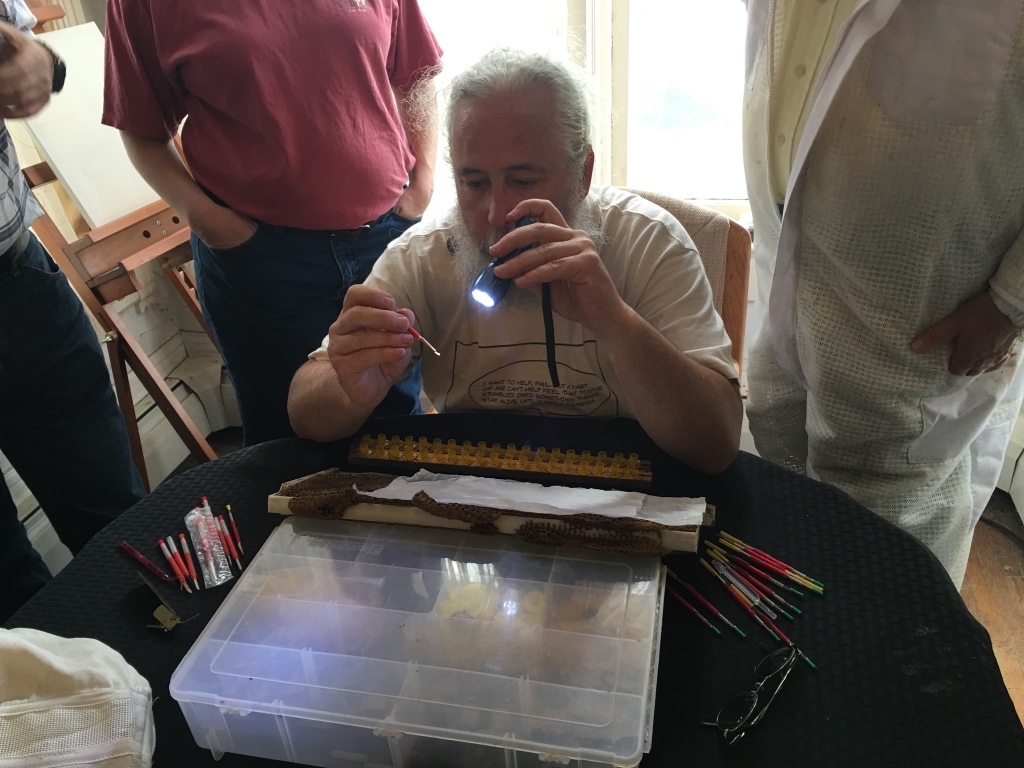
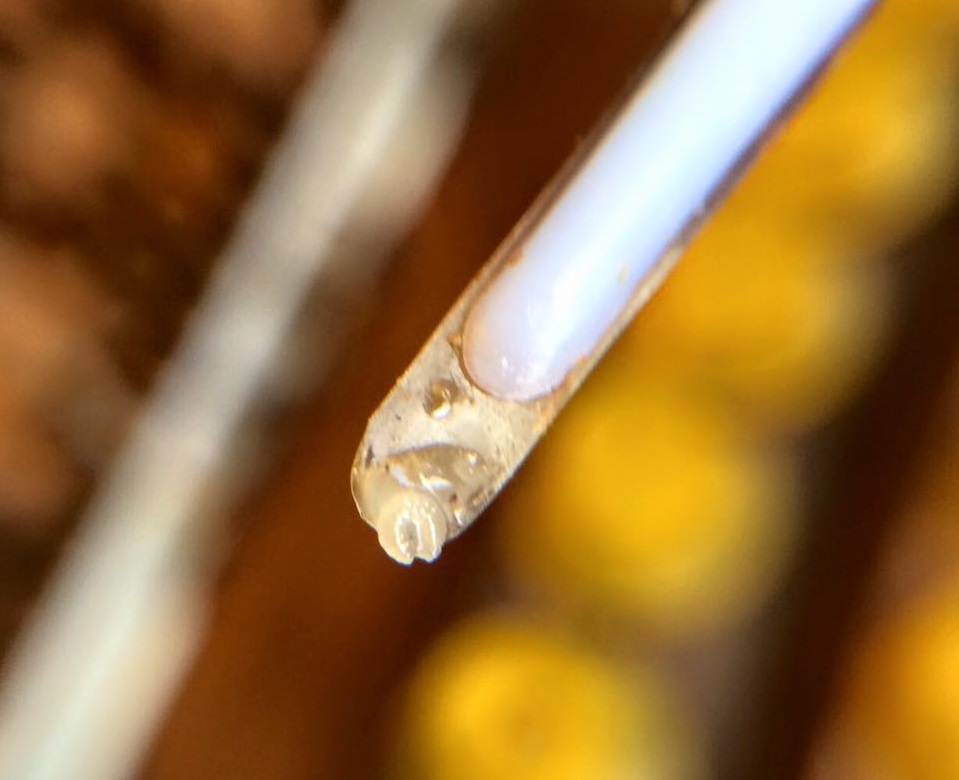
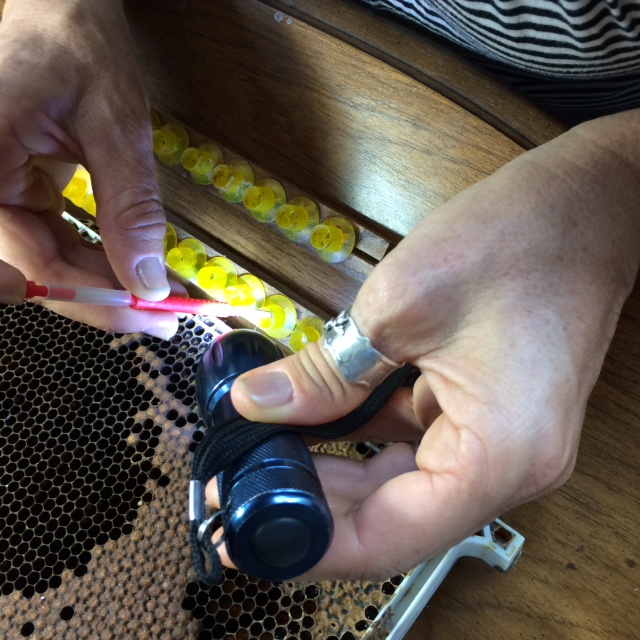
The Chinese grafting tools are what I like best. They pick up the royal jelly with the larvae. It takes some practice. I would describe the process like this:
Hold the Chinese grafting tool so that the horn part (the tongue) is against the wall of the cell you are grafting from. The "plunger" portion will be toward the center of the cell. Visualize the larva. Even if you lose sight of the larva, keep your eye on the spot you know it is. Slide the tongue down the wall until it hits the bottom. Tip it back slightly as you slide it across the bottom. Stop when the tip hits the wall. Lift up and slightly back simultaneously. This is so you don't just wipe the larva off on the side wall. If you do get it stuck on the wall, then you are not pulling back at the same time as you lift. It is a slightly complex motion but once you get the hang of it you will find it quite simple. Now press the tip down on the bottom of the queen cup and gently press the plunger while sliding the tool back. In other words, you pull the tongue out from under the larva as much as you push it off the tongue.
The Jenter method. Several variations of this are on the market. The concept is that the queen lays the eggs in a confinement box that looks like worker cells. Every other cell bottom of every other row has a plug in the bottom. When the eggs hatch the plug is removed and placed in the top of a cup. This accomplished the same thing as the Doolittle method without the need for so much dexterity and eyesight. On day 14 these are usually put in mating nucs.
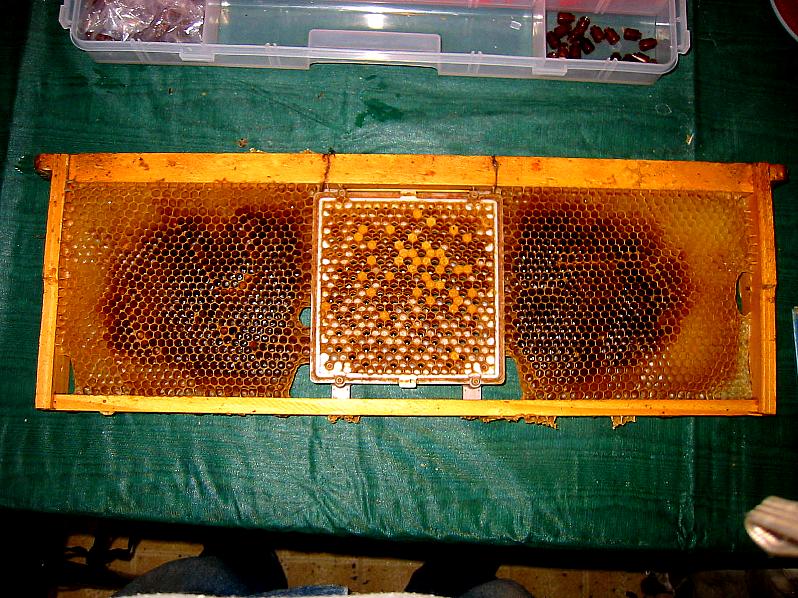
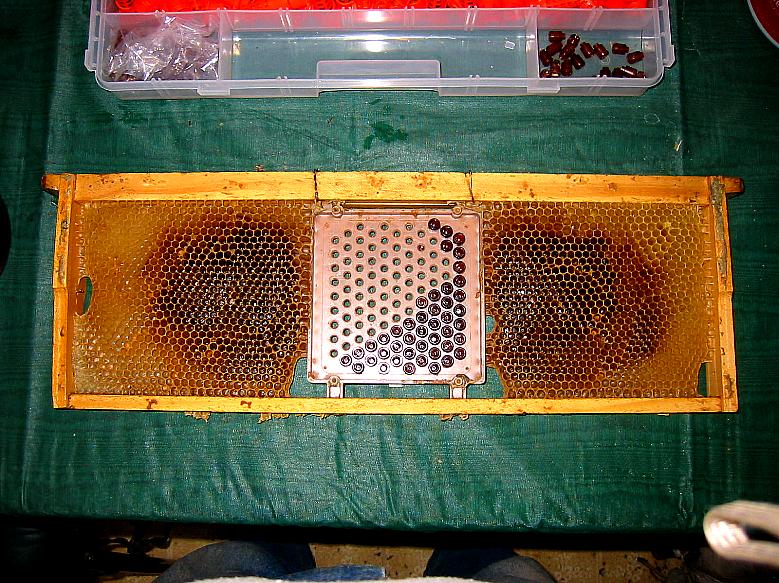
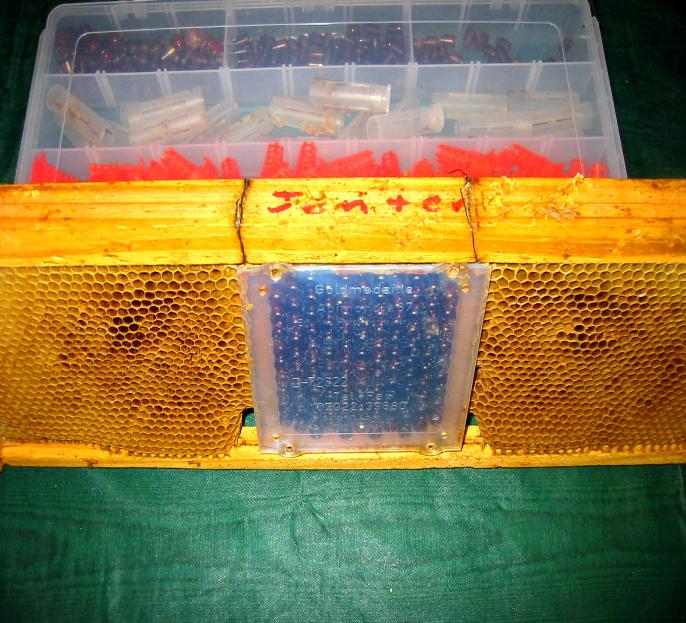
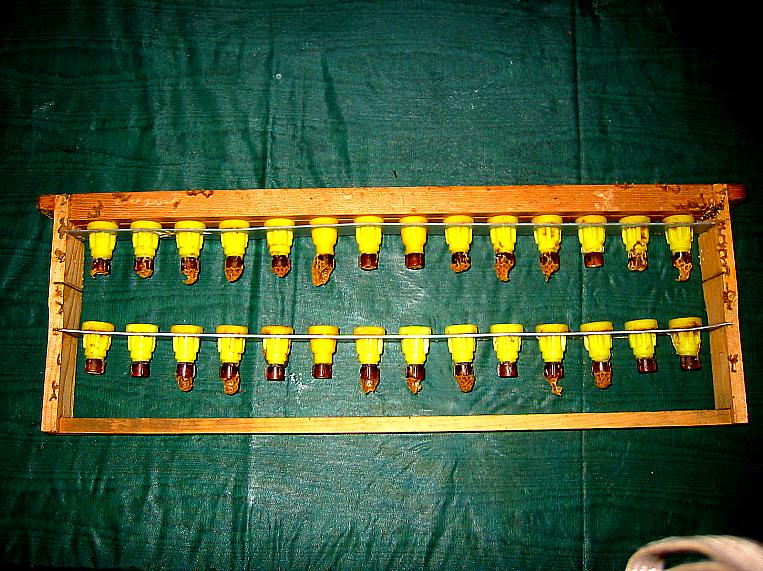
Jenter queen rearing system pictures. Front, back and top of the queen box and then a picture of a cell bar where I missed a queen cell the bees built in the cell builder. 17 queens dead.
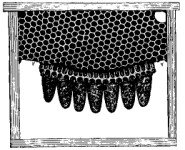
The Hopkins Method. In my version, the queen is confined with #5 hardware cloth to get her to lay in the new comb and so we know the age of the larvae (as the Doolittle method but on new comb empty instead of old comb). This should be wax, preferably with no wires so you can cut the cells out without wires in the way, although Hopkins says you should use wired comb so it doesn't sag. If you use wired comb, be sure to work around the wires when leaving larvae so the wires won't interfere. Release the queen the next day. You can also just put the new comb in the middle of the brood nest and check everyday to see if the queen has laid in it yet, to judge the age of the larvae. On the fourth day (from when the queen was confined or she laid in the comb) the larvae will be hatched. In every other row of cells all the larvae are destroyed by poking them with a blunt nail, a kitchen match head, or similar instrument. Then the larvae in every other cell in the remaining rows is destroyed the same way (or two cells destroyed and one left) to leave larvae with space between them. This is then suspended flatways over a queenless hive. A simple spacer is an empty frame under the frame with the cells and a super over that. This will require angling the frames somewhat and laying a piece of cloth on top. The bees perceive these to be queen cells, because of the orientation, and build cells off of them. They should be spaced enough apart to allow cutting them out on day 14 and distributing them to either hives to be requeened (that would have been dequeened the day before) or to mating nucs.
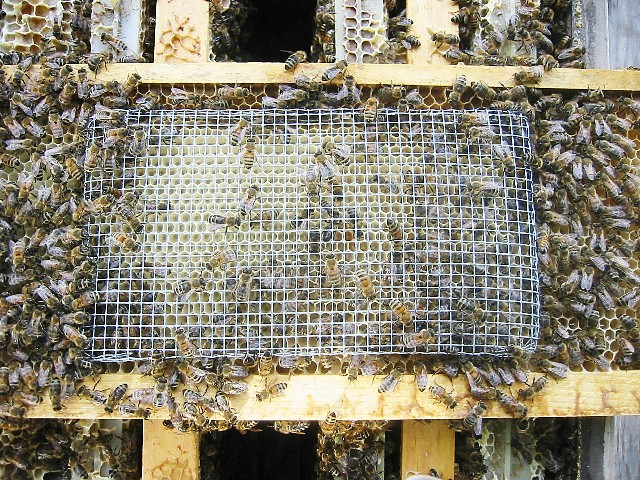

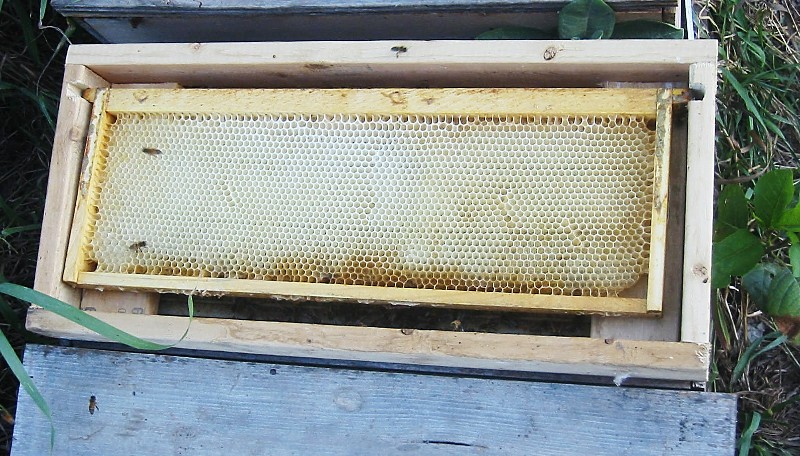
From left to right: #5 hardware cloth confinement cage. Hopkins shim to hold the frame over the box. Frame of larvae in the Hopkins shim.
- Isaac Hopkins on Queen Rearing 1886
- Alley Method of Queen Rearing
- Miller Method of Queen Rearing
- Smith's Better Queens Method
- Smith Method of Queen Rearing
- A simple way to raise a few good queens
Why I graft
This is why I graft. Let's look at my calendar for each method to get the cells in the starter box.
Jenter (or other graftless method):
- Monday: go to the beeyard, find the queen and confine her. Between 30 minutes and 2 hours depending on how hard the queen is to find.
- Tuesday: go to the beeyard and check for eggs. If there are eggs release the queen. If not, wait another day and check again. 20 minutes.
- Friday: go to the beeyard and shake a starter box full of bees and add some pollen and honey. Get the Jenter cage and transfer the larvae and put them in the starter box. 3 hours
- Total (if all goes well) 3 trips to the beeyard. 5 hours and 20 minutes. If all does not go well, another trip to the beeyard and a batch of queens that is running a day late.
Grafting:
- Friday: go to the beeyard and shake a starter box full of bees and add some pollen and honey. Find a frame with the right age larvae and graft the larvae and put them in the starter box. 3 hours 10 minutes
- Total 1 trip to the beeyard. 3 hours and 10 minutes
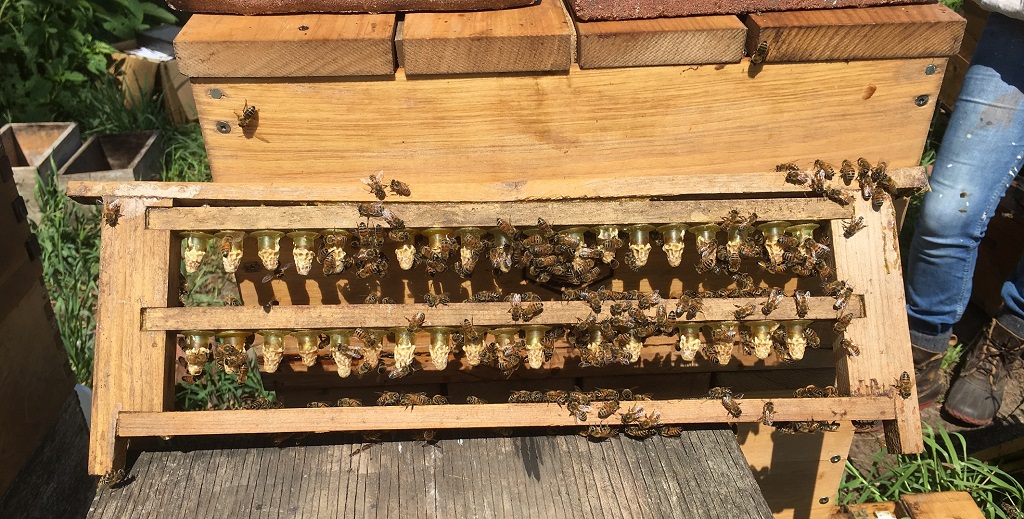
Cell Starter
For me the most difficult thing to get a grasp on and the most critical thing for queen rearing, other than the obvious issues of timing, was the cell starter. The most important thing about a cell starter is that it's overflowing with bees. Queenless is helpful too, but if I had to choose between queenless and overflowing with bees, I'd go for the bees. You want a very high density of bees. This can be in a small box or a large hive, it's the density that is the issue, not the total number. There are many different schemes to end up with queenless crowded bees that want to build cells, but don't ever expect a good amount of cells from a starter that is anything less than overflowing with bees.
The next most important issue with the starter is that it's well fed. If there is no flow you should feed to make sure they feed the larvae well.
Most of the rest of the complexity of the many queen rearing systems, which often seem at odds with one another, are tricks to getting consistent results under all circumstances. In other words, they are important to a queen breeder who needs a consistent supply of queens from early spring until fall regardless of flow and weather. For the amateur queen breeder, these are probably not so important as is the timing of your attempts. Rearing queens during prime swarm season just before or during the flow is quite simple. Rearing queens in a dearth or later or earlier than the prime swarm season will require more "tricks" and more work. For starters I would skip these "additions" and adopt them one at a time as you see the need.
A Cloake board (Floor Without a Floor) is a useful method. You can rearrange things so that part of the hive is queenless during the starter period and queenright as a finisher without a lot of disruption of the hive. But it's not necessary.
The simplest way I know of is to remove a queen from a strong colony the day before and cut it down to minimum space (remove all the empty frames so that you can remove some boxes and, if there are supers that are full remove those). This may even put them in a mood to swarm, but that will make a lot of queen cells. Make sure there aren't any queen cells when you start and if you use them for more than one batch be extra sure there are no extra queen cells in the hive as those will emerge and destroy your next batch of cells.
Another method is to shake a lot of bees into a swarm box aka a starter hive and give them a couple of frames of honey and a couple of frames of pollen and a frame of cells.
Beekeeping Math
Days until:
Caste Hatch Cap  Emerge
Queen  3½   8 ±1 16 ±2 Laying        28 ±5
Worker 3½   9 ±1 20 ±1 Foraging      42 ±7
Drone  3½  10 ±1 24 ±1 Flying to DCA 38 ±5
Queen Rearing Calendar:
Using the day the egg was laid as 0 (no time has elapsed)
Bold items require action by the beekeeper.
Day Action Concept
-4 Put Jenter cage in hive Let the bees accept it, polish it and cover it with bee smell
0 Confine queen. So the queen will lay eggs of a known age in the Jenter box or the #5 wire cage
1 Release queen. So she doesn't lay too many eggs in each cell, she need to be released after 24 hours
3 Setup cell starter Make them queenless and make sure there is a VERY high density of bees. This is so they will want queens and so they have a lot of bees to care for them. Also make sure they have plenty of pollen and nectar. Feed the starter for better acceptance.
3 ½ Eggs hatch
4 Transfer larvae and put queen cells in cell starter. Feed the starter for better acceptance.
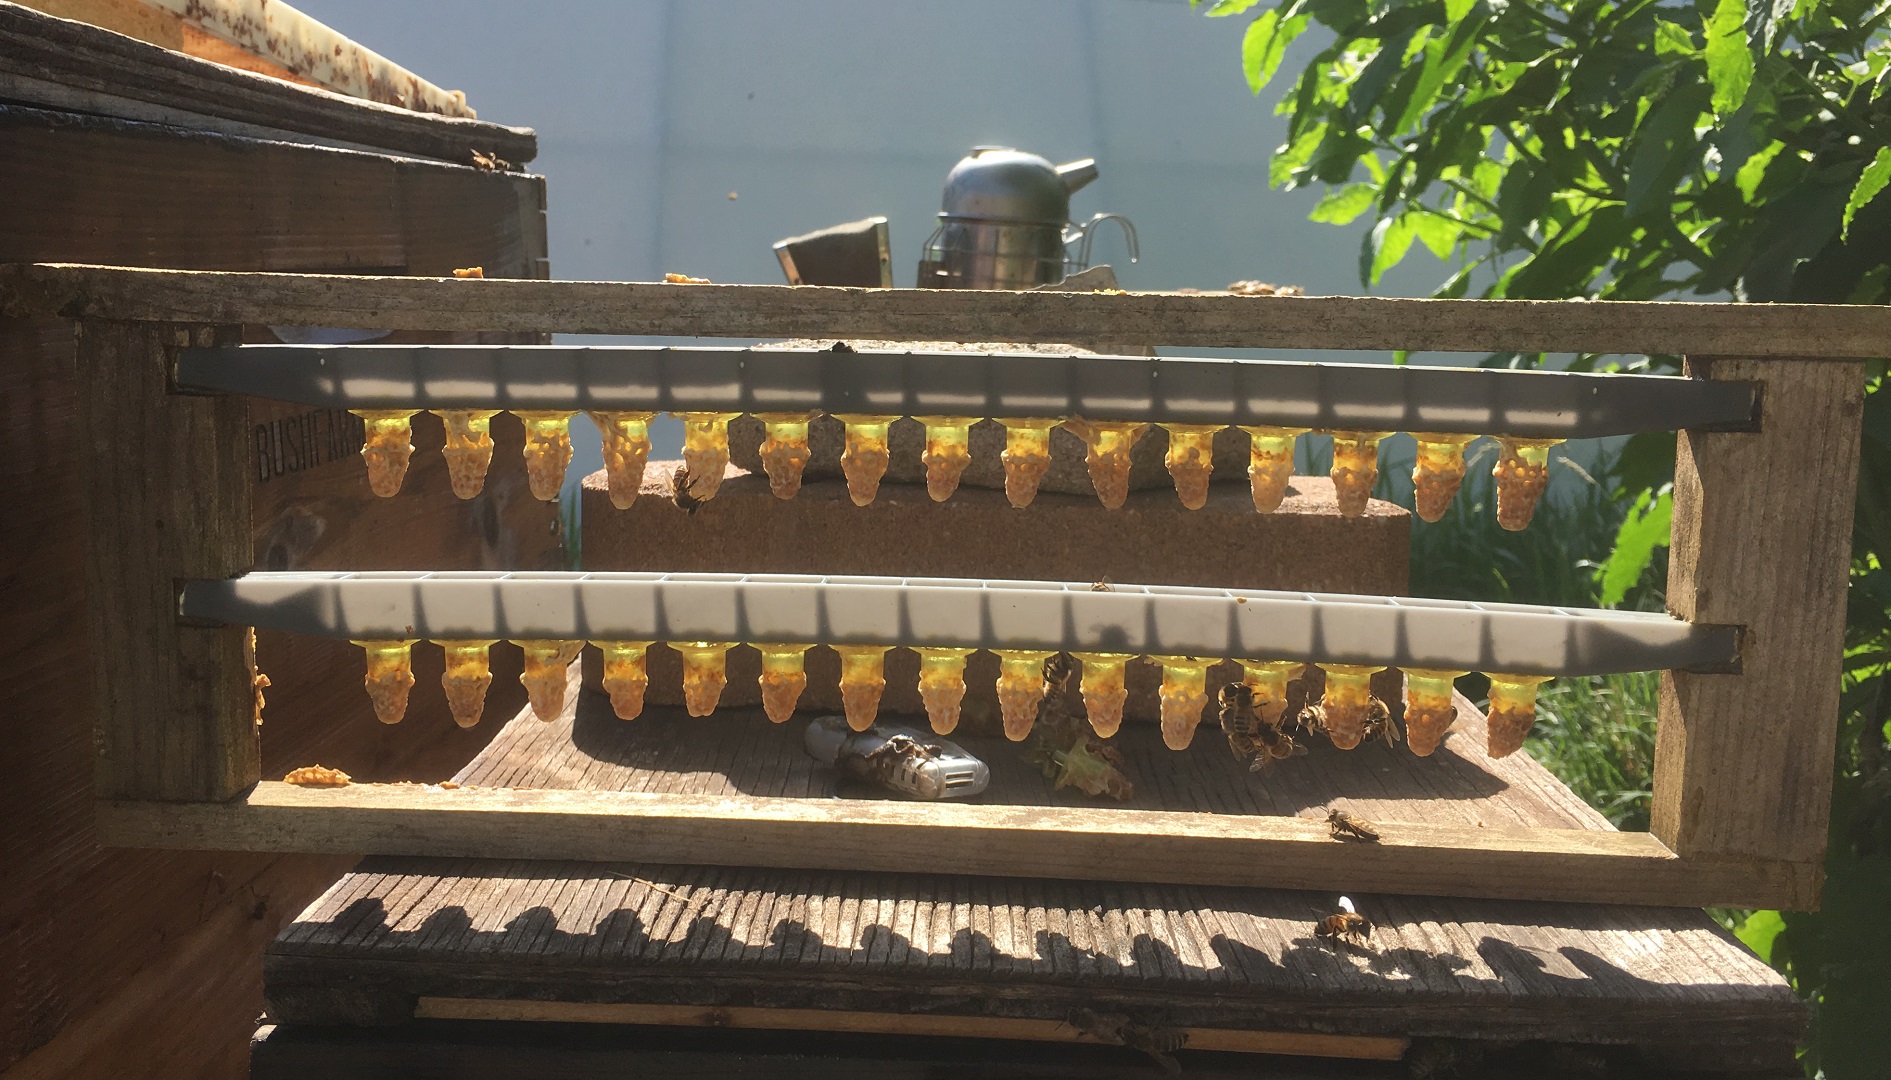
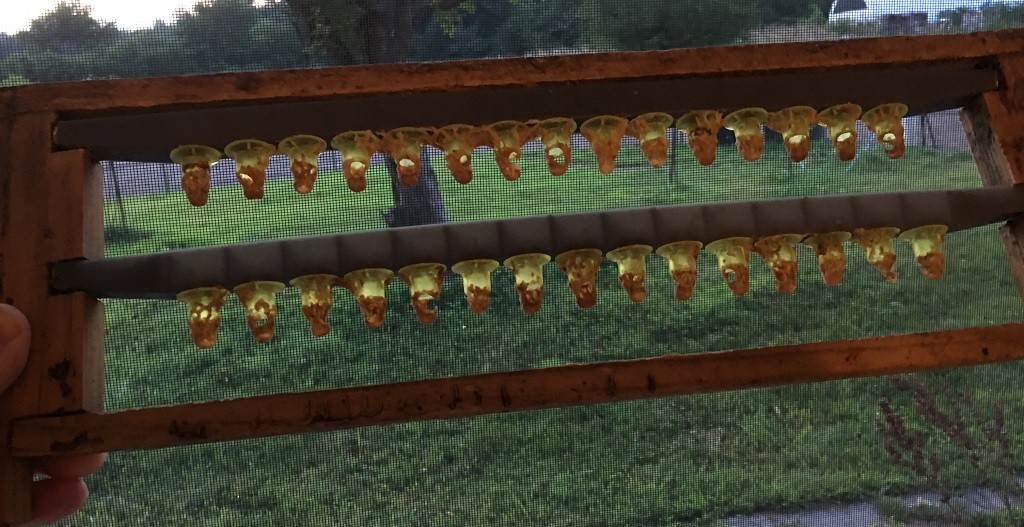
8 Queen cells capped
13 Setup mating nucs. Make up mating nucs, or hives to be requeened so they will be queenless and wanting a queen cell. Feed the mating nucs for better acceptance.
14 Transfer queen cells to mating nucs. On day 14 the cells are at their toughest and in hot weather they may emerge on day 15 or even 14 so we need them in the mating nucs or the hives to be requeened if you prefer, so the first queen out doesn't kill the rest.
15-17 Queens emerge (In hot weather, 15 is more likely. In cold weather, 17 is more likely and I've seen 18. Typically, 16 is most likely.)
17-21 Queens harden
21-24 Orientation flights
21-28 Mating flights
25-35 Queen starts laying
28 Look for laying queens in nucs (or hive being requeened). If found (in nucs), dequeen hive to be requeened
29 Transfer laying queen to queenless hive to be requeened.
Mating Nucs


Two By Four mating nucs. Four nucs with two frames each in one ten frame sized box. Note the blue cloth sticking out. These are canvas inner covers so I can open one nuc at a time without them boiling over into the next nuc. Also note the Ready Date Nuc Calendars on the end.
A note on mating nucs. In my opinion it makes the most sense to use standard frames for your mating nucs. Here are a few beekeepers who agree with that:
"Some queen-breeders use a very small hive with much smaller frames than their common ones for keeping their queens in till mated, but for several reasons I consider it best to have but the one frame in both the queen-rearing and the ordinary hives. In the first place, a nucleus colony can be formed in a few minutes from any hive by simply transferring two or three frames and the adhering bees from it to the nucleus hive. Then again, a nucleus colony can be built up at any time or united with another where the frames are all alike, with very little trouble. And lastly, we have only the one sized frames to make. I have always used a nucleus hive such as I have described, and would not care to use any other."--Isaac Hopkins, The Australasian Bee Manual
"for the honey-producer there seems no great advantage in baby nuclei. He generally needs to make some increase, and it is more convenient for him to use 2 or 3-frame nuclei for queen-rearing, and then build them up into full colonies...I use a full hive for each nucleus, merely putting 3 or 4 frames in one side of the hive, with a dummy beside them. To be sure, it takes more bees than to have three nuclei in one hive, but it is a good bit more convenient to build up into a full colony a nucleus that has the whole hive to itself."--C.C. Miller, Fifty Years Among the Bees
"The small Baby Nucleus hive had a run for a while but is now generally considered a mere passing fad. It is so small that the bees are put into an unnatural condition, and they therefore perform in an unnatural manner...I strongly advise a nucleus hive that will take the regular brood-frame that is used in your hives. The one that I use is a twin hive, each compartment large enough to hold two jumbo frames and a division-board."--Smith, Queen Rearing Simplified
"I was convinced that the best nucleus that I could possibly have, was one or two frames in an ordinary hive. In this way all work done by the nucleus was readily available for the use of any colony, after I was through with the nucleus...take a frame of brood and one of honey, together with all of the adhering bees, being careful not to get the old Queen, and put the frames into a hive where you wish the nucleus to stand...drawing up the division-board so as to adjust the hive to the size of the colony."--G. M. Doolittle, Scientific Queen-Rearing
"Where queen breeding is the prime object, the tendency is to use as small hives and as few bees as possible, so that the largest possible number of queens may be reared with the bees and equipment available. However, many of the most successful queen breeders find serious objections to baby nuclei and small mating boxes, and advocate nothing but standard frames for mating-hives."--Frank Pellett, Practical Queen Rearing
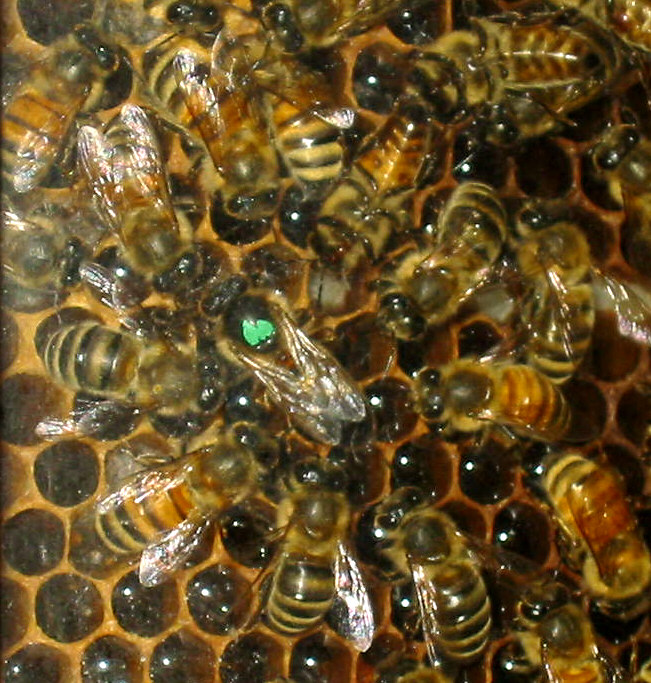
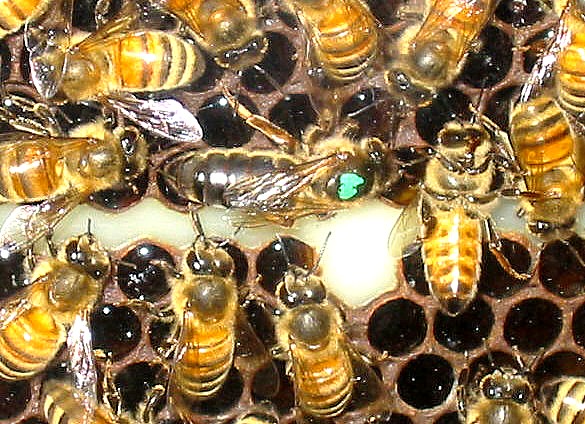
Queen marking colors:
Years Ending in:
- 1 or 6 - White
- 2 or 7 - Yellow
- 3 or 8 - Red
- 4 or 9 - Green
- 5 or 0 - Blue
Queen Catching and marking
Until you get the hang of it, there is always the risk of hurting the queen. But learning to do it is a worthwhile undertaking. I would buy a hair clip queen catcher and a marking tube and paint pens. Practice on a few drones with a color from a couple of years ago, or better yet the color for next year, so you don't confuse the drones with the queen. Use the current color for the queen.
My preferred method is to buy a "hair clip" queen catcher, a queen muff (Brushy Mt.) and a marking tube and a marking pen. Catch the queen gently with the hair clip. It is spaced so as not to easily harm the queen, but still be careful. If you put this and the marking tube and the paint pen (after it is shaken and started) in the queen muff then the queen can't fly off while you do this. Take the marking tube and slid out the plunger. If you move away from the hive you can lose some of the bees that are in and on the clip. Don't shake it while holding the clip portion or you may shake the queen out. If you take it in a bathroom with a window and turn off the lights you can be more assured she won't fly off. Or buy a queen muff from Brushy Mountain. Use a brush or a feather and brush off the workers as they come out and then try to guide the queen into the tube. She tends to go up and she tends to go for the light, so open the clip so she will run into the tube. If she doesn't and she runs onto your hand or glove, don't panic, just quickly drop the clip and gently but quickly put the tube over her. Cover the tube with your hand to block the light so she runs to the top of the tube. Put the plunger in. Be quick but don't hurry too much. Gently pin the queen to the top of the marking tube and touch a small dot of paint (start the paint pen on a piece of wood or paper first so there is paint in the tip already) on the middle of the back of her thorax right between her wings. If it doesn't look big enough just leave it. You need to keep her pinned for several more seconds while you blow on the paint to dry it. Don't let her go too soon or the paint will get smeared into the joint between her body sections and it may cripple or kill her. After the paint is dry (20 seconds or so) back the plunger up to halfway so the queen can move. Pull the plunger and aim the open end to the top bars and the queen will usually run right back down into the hive.
Jay Smith
Some quotes from Jay Smith (famous queen breeder and beekeeper who probably raised more queens than anyone who ever lived)
Queen longevity:
From "Better Queens" page 18:
"In Indiana we had a queen we named Alice which lived to the ripe old age of eight years and two months and did excellent work in her seventh year. There can be no doubt about the authenticity of this statement. We sold her to John Chapel of Oakland City, Indiana, and she was the only queen in his yard with wings clipped. This, however is a rare exception. At the time I was experimenting with artificial combs with wooden cells in which the queen laid."--Jay Smith
I would point out that Jay says: "This, however is a rare exception."
I think three years has always been pretty typical of the useful life of a queen.
Emergency queens:
"It has been stated by a number of beekeepers who should know better (including myself) that the bees are in such a hurry to rear a queen that they choose larvae too old for best results. later observation has shown the fallacy of this statement and has convinced me that bees do the very best that can be done under existing circumstances.
"The inferior queens caused by using the emergency method is because the bees cannot tear down the tough cells in the old combs lined with cocoons. The result is that the bees fill the worker cells with bee milk floating the larvae out the opening of the cells, then they build a little queen cell pointing downward. The larvae cannot eat the bee milk back in the bottom of the cells with the result that they are not well fed. However, if the colony is strong in bees, are well fed and have new combs, they can rear the best of queens. And please note-- they will never make such a blunder as choosing larvae too old."--Jay Smith
Quinby seems to agree:
"I want new comb for brood, as cells can be worked over out of that, better than from old and tough. New comb must be carefully handled. If none but old comb is to be had, cut the cells down to one fourth inch in depth. The knife must be sharp to leave it smooth and not tear it."--Moses Quinby
C.C. Miller's view of emergency queens
"If it were true, as formerly believed, that queenless bees are in such haste to rear a queen that they will select a larva too old for the purpose, then it would hardly do to wait even nine days. A queen is matured in fifteen days from the time the egg is laid, and is fed throughout her larval lifetime on the same food that is given to a worker-larva during the first three days of its larval existence. So a worker-larva more than three days old, or more than six days from the laying of the egg would be too old for a good queen. If, now, the bees should select a larva more than three days old, the queen would emerge in less than nine days. I think no one has ever known this to occur. Bees do not prefer too old larvae. As a matter of fact bees do not use such poor judgment as to select larvae too old when larvae sufficiently young are present, as I have proven by direct experiment and many observations."--Fifty Years Among the Bees, C.C. Miller
Queen Banks
A beekeeper can keep a number of queens in one hive if you get bees that are in the mood to accept a queen (queenless overnight or a mixture of bees shaken from several hives) and the queens are in cages so they can't kill each other. I've done these with a 3/4" shim on top of a nuc or a frame with plastic bars that hold the JZBZ cages. I put a frame of brood in periodically to keep them from developing laying workers or running out of young bees to feed the queens.

FWOF
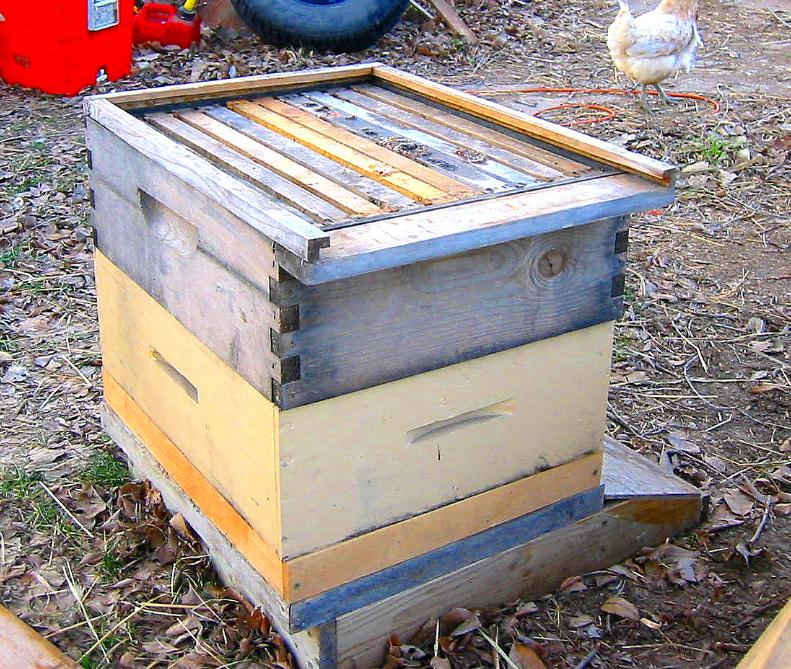
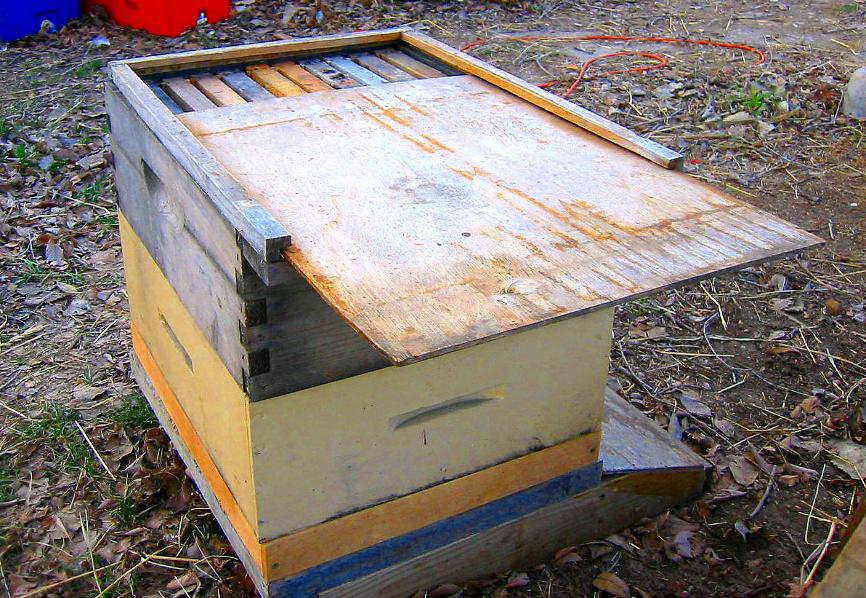
(Floor With Out a Floor aka Cloake Board). Used to allow converting a top box on a queen rearing hive to change from a queenless cell starter to a queenright cell builder or finisher. This one is made with a 3/4" by 3/4" piece of wood with a 3/8" x 3/8" groove in it. Hang it out 3/4"or more in front and put a piece across the front under the sides to make a landing board. Cut a piece of 3/16" or 1/4" luan to slide in for a removable bottom. Coat edges with Vaseline to keep the bees from gluing it in. From left to right: The frame on a hive with the floor out. Inserting the floor. The FWOF with the floor in.
Names of queen rearing methods
The names of queen rearing methods get a bit confusing. Here's some more information to add to the confusion: Queen Rearing Methods
________________________________________
Michael Bush
![]()
Copyright 2006, 2007 by Michael Bush